Saturday, January 23, 2016

Cavern Pillars

Interesting what two feet of snow will do. I've now posted more blog entries today than I did in the last 4 months of 2015 combined. Hmmm...

Anyway...one of the things I have noted in our first few sessions of using my new Underdark terrain set is that there are a few kinds of pieces that were not in my initial build that would be very useful to have. A few of those, begun over the last week or so, and completed today are:

90 degree pieces of 2 inch tall cavern wall for forming passage entries into larger caverns. I had been using simple gaps in the walls, and while these new pieces are not really necessary, they look nice and work well.
Cavern passage entries (at left)

A few more pieces of rocky scatter terrain which character models could climb up on.
Rocky scatter terrain

A few pieces of floor-to-ceiling 2 inch terrain. This would serve to break up larger caverns, and represent areas where the rock goes from floor to ceiling. In my terrain pieces, this is represented by the black painted centers. Our rule is that if there is enough gray for a miniature to stand on, then a character can climb to that spot (and claim the high ground, for whatever purpose). If there isn't enough gray painted area for a miniature, then it represents sheer wall. The picture below shows two new "floor to ceiling" pieces for breaking up larger spaces.
Cavern with entry, scatter and floor-to-ceiling pieces

I also took a few pictures today as I made the new floor-to-ceiling pieces. The process detailed below is consistent with every piece of terrain-making in my Underdark collection (as well as most of my dungeon terrain as well...).

Step 1 - Carve the basic shape out of the appropriate sized foam, in this case 2 inch soft blue insulation board. The blue board is softer than the pink, which is grainier and stiffer. I just had some blue scraps, so I used them. When in doubt, use what you already have (and have paid for...). It took me maybe one minute each to carve these pieces.
Step 1 - Carve simple shapes with a knife

Step 2 - Base coat the pieces with your gray base color. I use Behr "Iron Mountain" as my base (from Home Depot). A quart of interior flat is maybe $12 (US). It took perhaps 2 minutes each to base coat these pieces.
Step 2 - Paint gray

Step 3 - Dry brush with a lighter gray (in this case, I use Folk Art brand craft paint from Michael's, specifically "dove gray"). On terrain pieces this size, I use a large semi-stiff artist's brush (shown). Pay particular attention to dry brushing "top to bottom" so that you make a point to catch the top edges of the pieces, as these will be the most visible to the viewer. Once the base coat was dry, it took about 30 seconds to dry brush each piece.
Step 3 - Light gray dry brush

Step 4 - Add a couple spots of tan and/or white dry brush to break up the monotony of all gray. And another 30 seconds for this step.
Step 4 - A little tan and white

Step 5 - Add black paint to mark out of play areas. As noted above, in our games, if there isn't enough gray area to fit a miniature on, the area is unplayable, and represents vertical walls. In the case of these two pieces, no miniature can fit anywhere on the top surfaces... And a minute each for these. In all, paint drying time is longer than the time spent in doing the different steps.
Step 5 - Add "theater black" to mark out of play areas


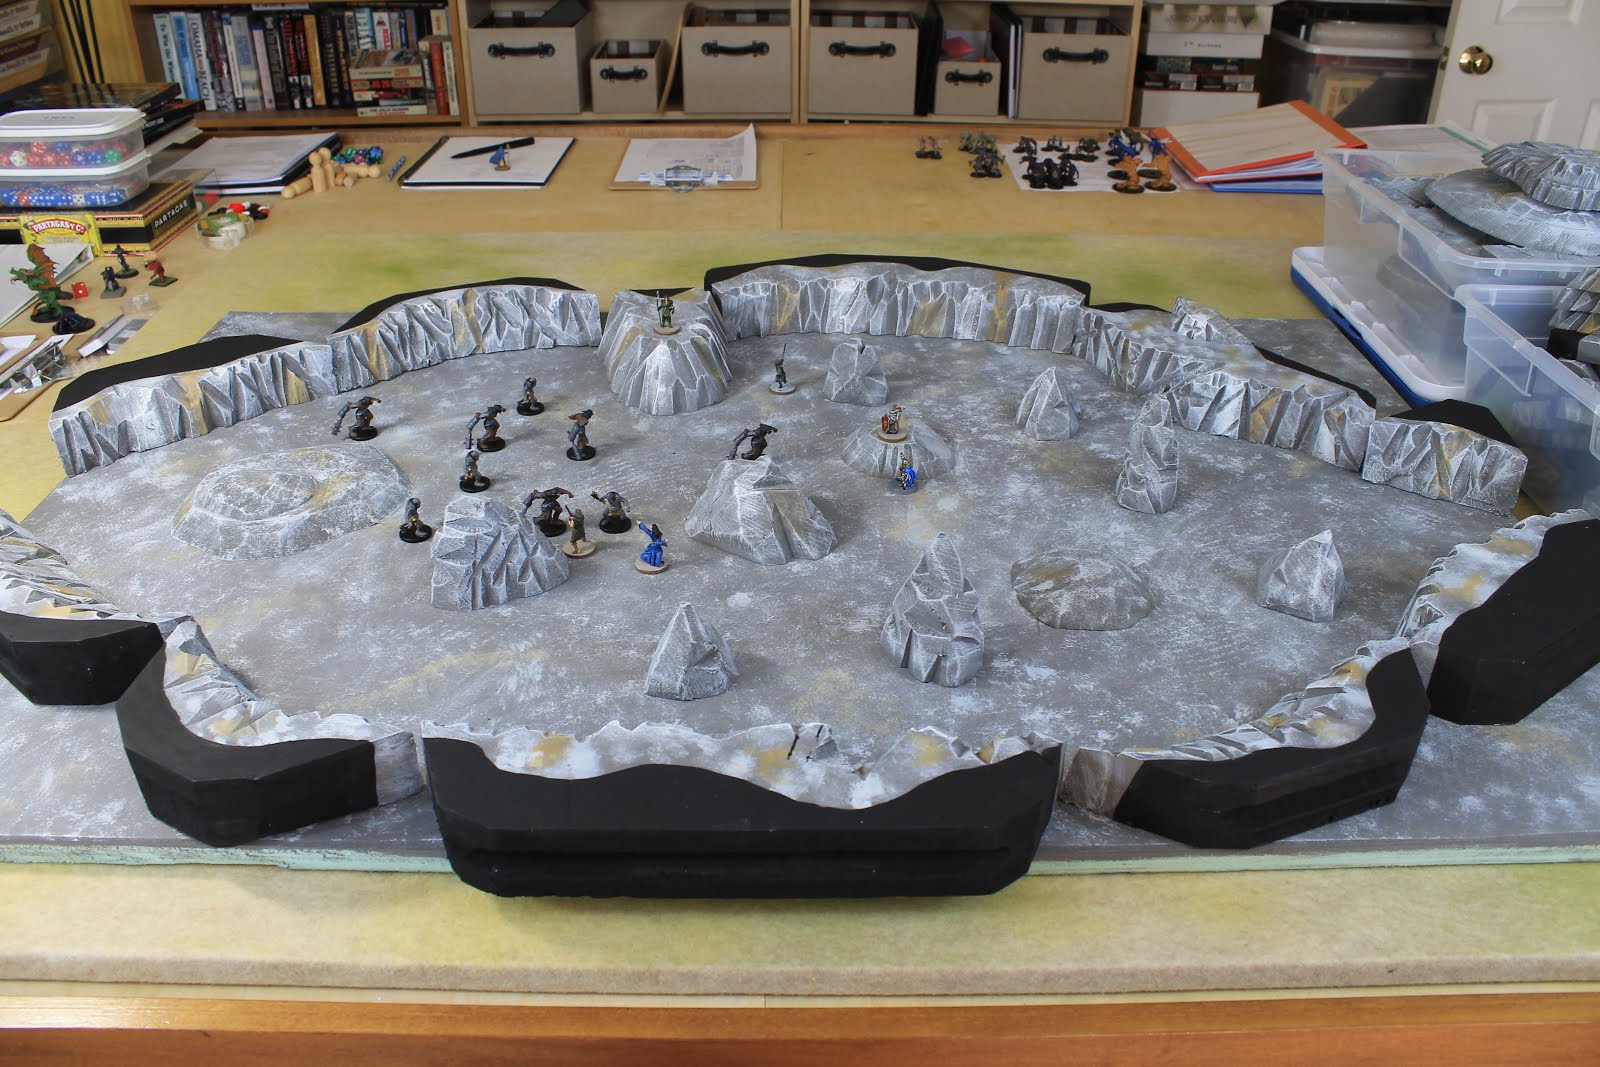
The finished product - the picture below shows the two new pieces, along with the 90 degree passage entry pieces and the new scatter terrain, making a large cavern with some interesting features. A large open area is never as interesting for an encounter area as one with a variety of features that the characters can interact with.
Finished product

So that's pretty much how I have made all of the stuff in the last few posts. Easy. Readily available. Cheap. All good things. A sheet of nominal 1 inch thick foam insulation board (4 foot by 8 foot by 3/4 inch thick) is about $15. A 2 foot by 8 foot sheet of 2 inch thick foam is about $18. A quart of paint, which can coat dozens of pieces, is about $12. Craft paints for highlighting are maybe $1.69 each. Add a couple of paint brushes and a knife, and you have all you need. Other than a place to store this big pile of foam...

I'm not aiming for fine art, which this is clearly not. And I am not aiming to make diorama quality detailed pieces. I want to make simple but effective pieces that enhance our gameplay, and these certainly seem to do that.

Runestones and Pools

A post on a couple of the small projects I have in the works.

First, some old and crumbling rune-carved pillars. These could be found above ground or below, and I do not have any specific plan in mind for them. Pillars are carved from foam and painted gray. A dull pencil is then used to etch runes lightly into the surface. The recessed etchings are then "painted" with a black Sharpie. After the rest of the basing is done, (piles of rubble, glued and then painted) a final dry brush highlight of light gray will be applied. I applied the highlight to the top surface of the one piece lying down just to see the final effect. All the rocks, whether on the rune pieces or the little pieces of scatter terrain by themselves, will be painted black, and then successively dry brushed with shades of gray.
Rune carved pillars - in process

For more complex areas of smaller caverns and passages, I have another set of modular pieces. These can be laid out as the adventurers explore. Making these kind of cave warrens in the way detailed in the prior post would be difficult. I would call this method a "positive space" way of doing it. Passages and caverns shown are hollow spots in the ground, everything else is solid. This is the same method I used for my linear dungeon pieces (squares, rectangles and regular hallways). [Which started all this, and which I will show sometime soon]
Caverns and passages - "Positive" Space


I saw a YouTube crafter's video recently about making recessed pool areas in foam pieces using nail polish (Black Magic Craft I believe it was). The chemicals in the nail polish melt the foam a little bit, before the melting stops. Judicious use of the polish gives you a controlled melt, which can then be painted and filled in (blues for water, oranges for lava pools, green for slime, brown for mud, etc).
Testing the nail polish melt method

To add cavern pieces of interest, I am going to make some that have pools of various kinds. The first such piece is shown below. Nail polish has melted three areas, which have subsequently been painted black. The rest of the painting will be done later. They will be water pools on this piece. After the painting is done, a bit of clear two part resin epoxy (like Envirotex) will be used to fill the pools.
Cavern piece with pool areas

And a close up of the larger of the melted pool areas. This is a nice technique that will have lots of uses in a fantasy world terrain set.
Nail polish melted pools

I will post pictures of the finished pieces, but that will likely be next weekend at the earliest.

In the meantime, I may be able to get some photos up of the dungeon terrain.

Dungeons and Dragons - Underdark Encounters

As I noted earlier, we have had a 5th edition Dungeons and Dragons game going since October of 2014. We play sporadically, every other week when we can manage it, but sometimes 3-5 weeks between sessions. We have seven total players, and typically have between 4 and 6 at any given session. Plus me. It's kind of odd, but in the entire time we have been playing, we have never had all 7 players at a game at the same time. We planned to a few times, but something always happens for somebody. This actually works out fairly well, as running a group of seven 4th and 5th level characters would be quite large, and a typical group of 5 is almost ideal purely from a game-management and encounter building perspective.

Anyway, the point of this post was just to show some pictures, as promised earlier, of the new modular Underdark terrain we have been using. The new terrain (and related binge miniatures purchasing) has really added a terrific dimension to the game.

For Underdark encounters in passages or caverns, I have a "stone" painted sheet of foam insulation board approximately 3 feet by 4 feet. This serves as the generic base for whatever needs to go on top of it. There are other custom pieces, but this is our starting point.

Passage walls, when needed, are typically laid out from a collection of 1-inch thick modular pieces of foam (cut from the remainder of the base sheet). These have been bevelled on one side (45 degrees or a little steeper), carved up (simply) on the bevelled edge to give texture, and then painted. The same colors are used on the modular walls as are on the base board. A medium-darkish gray flat interior latex house paint (Behr "Iron Mountain" in this case) is the base coat, over which "dove gray" craft paint is sponged and dry brushed. Small bits get a white or tan dry brush just to break up the monotony. The solid rock areas are given a coat of "theater black" paint to denote them as "off stage."

The scene below was a night's rest in an alcove off a passage, interrupted by a giant spider.
Resting for the Night, with a Giant Spider

For larger caverns, I have made an assortment of modular pieces from 2-inch thick insulation board, using the exact same process as for the thinner pieces.
2 inch foam cavern and passage walls

The larger pieces, laid out over the same baseboard, provided the scene for an encounter in a large cavern. In addition to the walls and floors, a number of foam chunks have been spread around as scatter terrain, marking rises in the floor of the cavern as well as serving as stalagmites and other rocky protrusions jutting up from the floor.
Large Cavern Encounter

The combat between our party and some bugbears and grimlock slaves is shown below.
Combat Closeup - Bugbears and Grimlocks

It doesn't take much effort (or skill) to make these pieces, just time and a few basic and cheap materials. They serve to make a multitude of different configurations, and the basic pieces, in conjunction with a few special pieces, can make a huge difference in the visual appeal of the game.

I'll show some of those special pieces and some current works in progress soon.

Blizzard of 2016 - Winter Storm Jonas

Stuck in the house with 12-18 inches of snow down and a little more to come between now and midnight, so I might as well see if I remember how to do a blog post. It is blowing hard and the snow is still coming down, so I have no real idea of how much we do have. Depending on where you look on the deck and in the yard, we have a couple of feet or nothing. Whatever the truth is, it's a lot, and with more to come over the next 12 hours.
18 inches or nothing? Hard to tell...

Everyone is safe and warm, and we have power (and internet), so all is good with the world. Tomorrow (Sunday) will be the day to dig out, or more accurately, pay someone else to dig out. In the meantime, there is nothing to do but lounge around, do some hobby stuff and spend time with the family, and wonder if the business trip I am supposed to fly out for on Monday morning will happen. I guess I should say, the trip will happen at some point early this week, but will it be Monday morning or some time after?...
Garage roof glacier

The kids are bummed that we had this big storm on a Saturday. I can understand that.

Oh, and I guess sometime before dark I should go out into the side yard and get that piece of my chimney siding I see laying out there and stick it in the garage before it blows away entirely...